Why Kyoto temple photography rewards patience, not quick hits
Kyoto is often reduced to five overused angles on social media. In reality, Kyoto Japan holds more than 1 600 temple and shrine complexes, each offering different geometries, light, and stories for your photography. If you approach Kyoto temple photography as a slow working visit rather than a checklist, the city opens up in layers that standard travel pictures never touch.
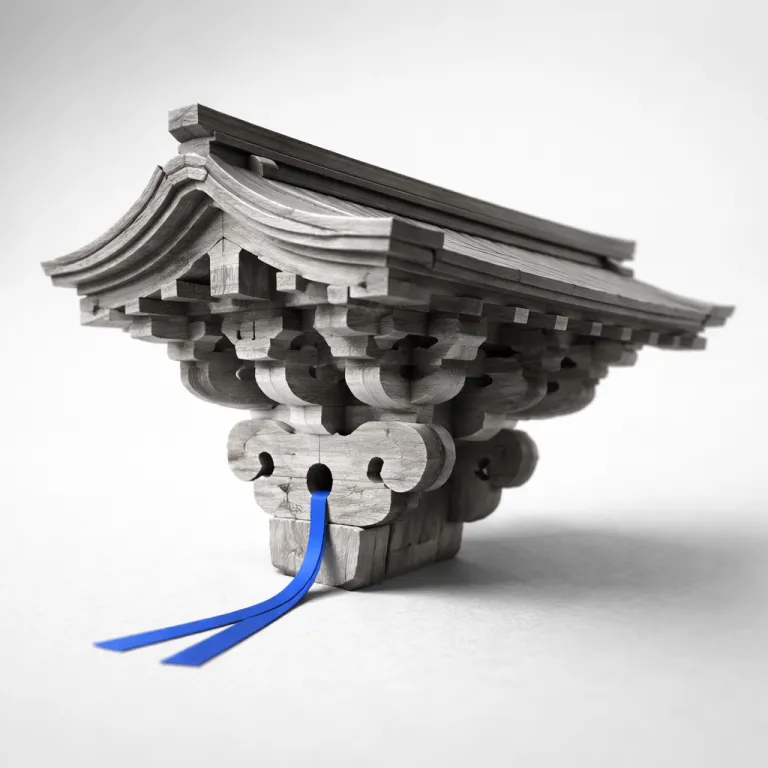
Japanese temple architecture is built around axial lines, courtyards, and carefully framed views. That means a temple in Japan often photographs best when you work with symmetry, compression, and repetition instead of grabbing wide chaotic photos that flatten everything. Spend time walking the engawa verandas, watching how sliding doors, lanterns, and a distant pagoda align ; this is where temple Japanese design quietly guides your images.
In Kyoto Japan, the most photographed sites such as Kiyomizu Dera, Fushimi Inari Shrine, and Yasaka Pagoda are famous for good reasons. Yet the same vantage points repeat endlessly, which can make your own pictures feel generic even if the light is perfect. To move beyond that, treat each Japanese temple as a living Buddhist temple and cultural space first, and only second as a backdrop for travel photography.
Think about how traditional Japanese carpentry, stone paths, and moss gardens shape your frame. A temple Kyoto complex like Kiyomizu Dera or a quieter dera temple in the Higashiyama District will reward you when you slow down, wait for a single monk to cross the courtyard, and let the scene breathe. Kyoto temple photography becomes less about collecting images and more about reading how Japan Kyoto has layered faith, power, and everyday life into these wooden structures.
Remember that Kyoto is not only its Japan famous icons but also hundreds of small halls where incense curls through low light. Some of your strongest photos will come from these modest spots, where a single beam of light hits tatami or a weathered statue. Approach every inari shrine, every Japanese garden, and every street Kyoto alley with the same attention you would give to Kiyomizu or Fushimi Inari, and your travel images will start to feel uniquely yours.
Reading light in Kyoto: from temple spring blossoms to autumn foliage
Light in Kyoto shifts fast, and temple photography lives or dies on how you follow it. Early morning in the city brings soft, cool tones that flatter wooden beams and stone lanterns, while late afternoon and sunset wrap pagoda silhouettes in warm haze. Plan your travel days around light rather than attractions, and your Kyoto temple photography will immediately feel more intentional.
At Kiyomizu Dera, sunrise often gives you the cleanest view of the main hall and its stilts above the forest. From the wooden terrace, look toward the Yasaka Pagoda area as the city wakes, and use a mid telephoto lens to compress the layers of roofs, distant hills, and temple Japanese structures. By late day, the same spots are crowded, so shift to side paths and lower platforms where you can frame Japan Kyoto foliage or cherry blossom branches against the architecture.
Fushimi Inari is a different light puzzle altogether. The inari shrine tunnels glow brightest when the sun is high enough to filter through the trees, but that same light can blow out your photos if you expose only for the orange gates. Work the shaded sections, meter for the mid tones, and wait for a single figure in neutral clothing to walk through ; this gives your images scale and a sense of pilgrimage that suits a Buddhist temple complex.
In temple spring season, Kyoto Japan becomes a study in pale pink and fresh green. Cherry blossom petals around a Japanese garden pond at a smaller temple Kyoto site can be more photogenic than the crowds at the most Japan famous spots, especially in the Higashiyama District backstreets. If you are planning broader seasonal travel, pair Kyoto with refined spring getaways elsewhere by researching curated spring break destinations across the United States, then compare how different cities handle crowds and fragile blossoms.
Autumn foliage around Kyoto temple gardens brings a different challenge. Strong contrast between dark wooden halls and bright maple leaves can trick your camera meter, so bracket exposures or use manual mode to protect highlights in your pictures. Whether you are shooting free handheld or with a tripod outdoors where allowed, remember that Kyoto temple photography is about how light grazes wood, stone, and foliage, not only about the subject itself.
Beyond the icons: lesser shot temples that deserve half a day
Once you have worked Kiyomizu Dera, Fushimi Inari, and the Yasaka Pagoda area, the temptation is to move on to another city. Resist that impulse, because Kyoto hides quieter temples where your photography can finally breathe. Dedicating half a day to a single Japanese temple often yields more nuanced photos than racing between ten Japan famous landmarks.
Honen in, tucked off the Philosopher’s Path, is a masterclass in subtle geometry. Its moss covered steps, simple wooden gate, and intimate Japanese garden invite you to slow down, watch the light shift across foliage, and build images that feel almost free of time. Here, temple spring scenes with fresh leaves or late autumn colors can be stronger than any crowded cherry blossom shot at a larger temple Kyoto complex.
Nearby Reikan ji opens seasonally and rewards patience with layered compositions. Stone paths, white walls, and carefully pruned trees create natural leading lines that suit both wide and tighter photos, especially when soft rain deepens the tones. Because it is less visited than Kiyomizu Dera or a central inari shrine, you can wait for clean frames without people, letting the architecture and garden carry your pictures.
For a different mood, ride the train north to Kurama Dera in the mountains. The ascent through cedar forest, punctuated by small shrine structures, offers chances to photograph pilgrims and hikers in a more rugged Japan Kyoto setting. At the top, the main hall and its platform open toward distant ridges, giving you images that contrast strongly with the dense city scenes around street Kyoto lanes and the Higashiyama District.
These lesser known dera temple sites also help you refine your Kyoto temple photography ethics. With fewer crowds, you can pay closer attention to how locals move, where they pause to pray, and which areas feel more like active worship spaces than tourist spots. That awareness will carry back with you to every Buddhist temple, from Kiyomizu to Fushimi Inari, and it will show in the respect embedded in your travel photos.
Etiquette, access, and gear: working like a respectful photographer
Kyoto’s temples are not open air studios ; they are living religious spaces. Temple authorities and local worshippers expect photographers to move quietly, dress modestly, and avoid blocking pathways, even in the most photogenic spots. Treat every Japanese temple as someone else’s place of practice, and your Kyoto temple photography will feel more grounded and welcome.
Some rules are consistent across Japan Kyoto sites, and you should internalize them before you start shooting. Tripods are generally permitted outdoors but prohibited indoors. Photography inside temple halls is often prohibited ; check specific temple rules. Is commercial photography allowed in Kyoto temples? Commercial photography requires prior permission from temple authorities. These guidelines apply whether you are at Kiyomizu Dera, a small dera temple in the Higashiyama District, or a major inari shrine such as Fushimi Inari.
Gear wise, think in terms of restraint rather than maximalism. A fast standard zoom and a short telephoto will handle most temple Kyoto situations, from tight street Kyoto scenes near Yasaka Pagoda to compressed views of a pagoda rising above cherry blossom trees. Wide lenses have their place, but Japanese temple architecture often looks stronger when you step back, compress layers, and let the lines of roofs, lanterns, and foliage stack elegantly in your photos.
Low light wooden interiors, where photography is allowed, demand fast lenses and steady hands. Raise ISO without fear, shoot in RAW to protect dynamic range, and brace yourself against pillars instead of setting up a tripod where it is banned. When working in a Japanese garden or around reflective ponds, consider a polarizing filter to control glare and deepen colors, especially during temple spring or peak foliage seasons.
Finally, remember that Kyoto Japan has seen a rise in smartphone photography and social media sharing, which can make spaces feel crowded even when entry is free. Step aside from the main flow, look for side corridors, and wait for moments when a single visitor bows or lights incense in a Buddhist temple hall. Those quiet pictures, made with patience and respect, will outlast any quick snapshot of a Japan famous gate or pagoda at sunset.
A four day Kyoto shoot plan built around light, not lists
Think of four days in Kyoto as a compact working residency. You are here to understand how light, ritual, and architecture interact, not to tick every temple off a map. This mindset turns Kyoto temple photography from a frantic chase into a measured rhythm that suits both the city and your own creative process.
Day one, base yourself near the Higashiyama District and start before dawn at Kiyomizu Dera. Work the main hall and surrounding paths as the city brightens, then drop into side streets where wooden houses, power lines, and the distant Yasaka Pagoda give you layered street Kyoto scenes. Spend the afternoon in smaller Japanese garden spaces nearby, focusing on details like stone basins, moss, and sliding doors that speak quietly of traditional Japanese life.
Day two, devote the morning to Fushimi Inari Shrine, entering early enough to walk long stretches of torii in relative calm. Alternate between tight compositions of gate patterns and wider images that show the inari shrine structures against forested slopes, remembering that Japan famous views are only a starting point. After lunch, ride north to Honen in or Reikan ji for a contrasting mood, where foliage, silence, and simple halls invite slower photography.
Day three, head into the hills toward Kurama Dera, giving yourself a full day for the journey. Photograph fellow travelers on the trail, small wayside shrines, and the main dera temple complex against mountain backdrops, building a narrative of pilgrimage rather than isolated pictures. Return to the city by sunset and, if energy allows, capture blue hour around a quieter temple Kyoto site where lanterns begin to glow.
On day four, keep your schedule intentionally free to revisit whichever Kyoto Japan location surprised you most. Maybe that is a Japanese temple garden in temple spring bloom, a nearly empty Buddhist temple hall on a rainy morning, or a backstreet near Yasaka Pagoda where laundry lines and scooters undercut the postcard image of Japan Kyoto. Ending your travel with this open day lets your best images emerge from instinct and memory, not from any list of must see spots.
FAQ
When is the best season for Kyoto temple photography?
Kyoto works year round, but temple spring and autumn are the most visually dramatic. Cherry blossom season brings soft light and pale tones that flatter wooden halls, while autumn foliage adds strong contrast and color around Japanese garden ponds. Winter can be rewarding too, with occasional snow simplifying temple Japanese lines and reducing crowds.
How can I avoid crowds at famous temples like Kiyomizu Dera and Fushimi Inari?
Arrive at Kiyomizu Dera before sunrise and head straight to the main terrace, then move quickly to side paths as tour groups arrive. At Fushimi Inari, start early, walk beyond the lower loops of torii gates, and keep climbing until the crowds thin, then work back down slowly for varied photos. Visiting on weekdays and in light rain also helps you find quieter moments at each Japanese temple.
Are tripods allowed inside Kyoto temples?
Tripods are generally prohibited inside temple halls across Kyoto Japan, even where photography itself is allowed. Outdoors, many temple Kyoto complexes permit tripods in courtyards and gardens, but you should always check posted signs and avoid blocking pathways. When in doubt, ask a staff member or volunteer before setting up, and be ready to shoot handheld if requested.
What lenses are most useful for photographing temples in Japan Kyoto?
A standard zoom lens covering roughly 24–70 mm in full frame terms will handle most Kyoto temple photography needs, from wider courtyard scenes to tighter architectural details. A short telephoto around 85–135 mm is excellent for compressing pagoda layers, isolating statues, and capturing candid portraits at a respectful distance. Ultra wide lenses can be helpful in tight interiors or narrow street Kyoto alleys, but they are less essential than many travelers assume.
Can I photograph people praying at a Buddhist temple in Kyoto?
It is generally acceptable to photograph worshippers from a respectful distance, provided you remain unobtrusive and avoid using flash. Always prioritize a person’s privacy and dignity over getting a dramatic shot, and never step into an active prayer area or block access to altars. When in doubt, lower your camera, watch the ritual, and focus instead on architectural or garden details around the Japanese temple.